
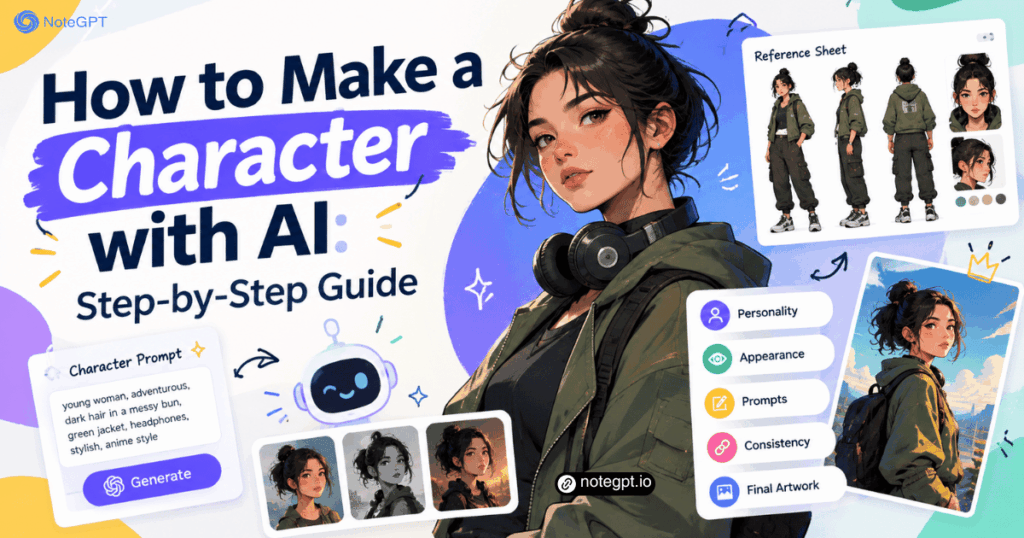
A memorable character is more than an attractive face. The strongest characters have a clear role, recognizable silhouette, believable personality, and visual details that support their story. Whether you need a hero for a game, a mascot for a business, an illustrated figure for a book, or a recurring personality for social content, you need to make several creative decisions before generating the final image.
You do not need professional illustration skills to get started. A free AI character generator can turn a written description into visual concepts, helping you explore appearances, outfits, moods, and art styles quickly. The key is to treat AI as a design partner rather than a one-click replacement for creative direction.
This guide explains how to make a character step by step, write a useful prompt, evaluate generated concepts, and keep the character visually consistent across future scenes.
What Makes a Good Character?
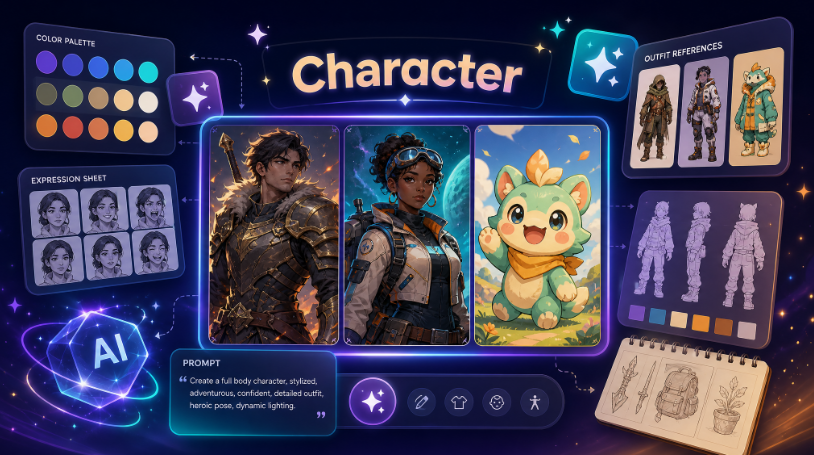
A good character feels specific. Viewers should be able to recognize the character from a few defining traits, even when the pose, outfit, or background changes. Those traits might include a distinctive hairstyle, unusual accessory, strong color palette, body shape, facial feature, or signature piece of clothing.
Appearance alone is not enough. Personality determines posture, facial expression, wardrobe, and the way a character interacts with the world. A confident detective may stand upright and wear a structured coat. A nervous inventor might lean forward, carry overloaded pockets, and avoid direct eye contact. Visual design becomes more convincing when it reflects behavior.
The final requirement is purpose. A game character needs readable shapes in motion. A children's book character needs expressive emotions. A brand mascot must be simple enough for icons, packaging, and social media. Defining the intended use before generating images prevents you from choosing a beautiful concept that does not work in practice.
Step 1: Define the Character's Role
Start with one sentence that explains who the character is and why the audience should care. Avoid beginning with eye color or clothing. Begin with function.
For example: “A resourceful teenage mechanic who repairs forbidden robots in a floating city.” That sentence immediately suggests age, occupation, setting, conflict, props, and attitude. It gives you more creative direction than “a cool girl with goggles.”
Answer these questions:
- What role does the character play?
- What does the character want?
- What obstacle stands in the way?
- Who is the intended audience?
- Where will the character appear?
You do not need a complete biography. A focused concept is enough to guide the first visual exploration.
Step 2: Build a Simple Personality Profile
Choose three primary personality traits and one contradiction. Contradictions make characters feel less generic. A warrior can be fearless in battle but uncomfortable in social situations. A cheerful mascot can secretly be intensely competitive.
Add a motivation, a fear, and one habit. These details influence expressions and poses. A cautious explorer may study the ground before moving. An impatient wizard may hold a half-finished spell while looking away. A thoughtful mascot may carry a tiny notebook.
Keep this profile short enough to reuse inside a prompt. Long backstories often distract image generators from the visual information that matters most.
Step 3: Choose an Art Style and Audience
The same concept can look completely different as realistic concept art, anime, children's illustration, 3D animation, comic art, pixel art, or a flat vector mascot. Choose the visual language based on where the character will appear.
A mobile game might need a stylized 3D character with a readable silhouette. A picture book may work better with soft shapes and visible brush texture. A business mascot usually needs flat colors and simplified details. A fantasy novel cover can support more realistic lighting and complex materials.
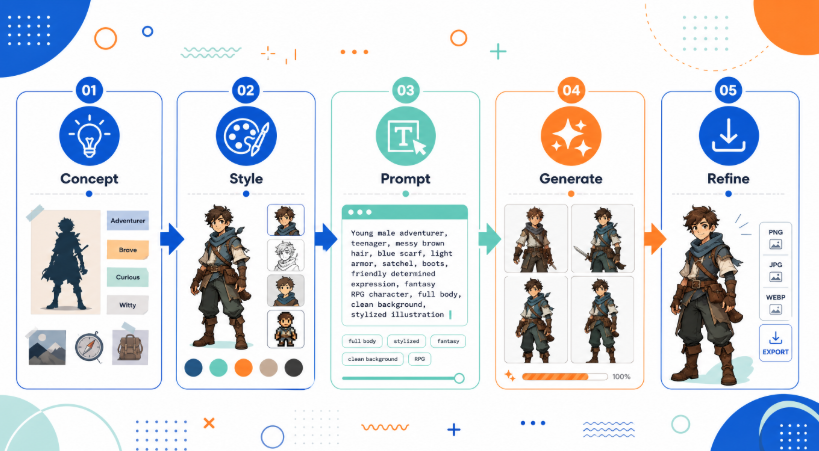
Reference a broad artistic medium rather than asking the AI to imitate a living artist. Descriptions such as “graphic novel ink,” “cinematic fantasy concept art,” or “soft watercolor children's illustration” provide direction without copying a specific person's recognizable style.
Step 4: Design the Character's Appearance
Now translate personality into visible details. Work from large shapes to small ones.
Start with age range, body type, height, and silhouette. Then add face shape, hair, skin tone, and distinctive features. Choose clothing that fits the role and setting. Finally, add one or two memorable accessories, such as a mechanical glove, oversized scarf, cracked crown, messenger bag, or star-shaped glasses.
Limit the color palette to three or four main colors. A controlled palette makes the character easier to recognize and helps maintain consistency later. You can reserve one accent color for an important detail, such as glowing eyes or a signature accessory.
Avoid loading the design with too many unrelated elements. If every detail is special, nothing becomes memorable.
Step 5: Write a Strong AI Character Prompt
A useful character prompt moves from identity to appearance, style, pose, setting, and technical presentation. Include concrete details, but keep them organized.
Use this formula:
Character role + age and body type + facial features + hair + outfit + signature accessory + personality or expression + art style + pose or framing + lighting and background
Example prompt:
“Full-body character design of a resourceful teenage robot mechanic, compact athletic build, warm brown skin, short curly black hair with a copper streak, amber eyes, practical navy coveralls with rolled sleeves, tool belt and scratched mechanical glove, confident half-smile, stylized 3D animation, neutral standing pose, clean light-gray studio background, soft rim lighting, detailed but readable silhouette.”
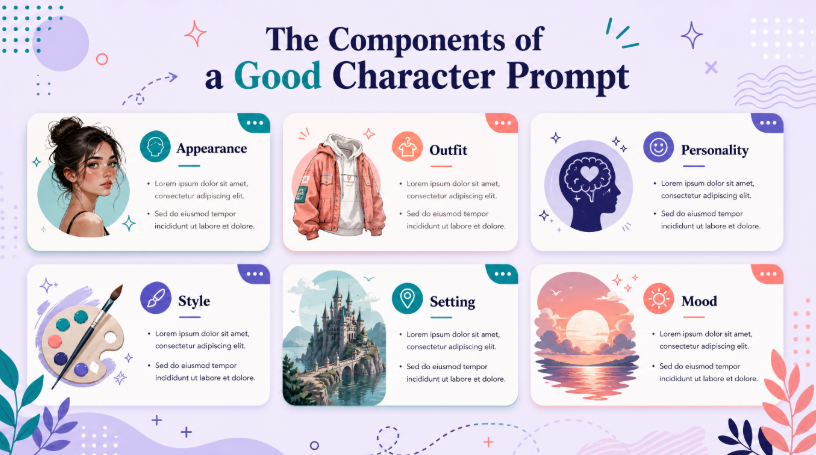
You can create a character with AI by entering a prompt like this and generating several alternatives. Change one variable at a time—such as outfit, age, or art style—so you can identify which choice improves the design.
Step 6: Generate Several Concepts
Do not stop at the first attractive image. Generate multiple versions from the same core prompt. The goal of the first round is exploration, not completion.
Look for recurring strengths. One result may have the best silhouette, another the most expressive face, and another the strongest clothing design. Record the features you want to keep, then combine those descriptions in a refined prompt.
A practical process is:
- Generate four to eight broad concepts.
- Select the best two directions.
- Rewrite the prompt with the strongest details.
- Generate another focused set.
- Choose one design as the master reference.
This process produces a more intentional result than repeatedly pressing generate without changing the creative brief.
Step 7: Evaluate the Design
A character can look impressive at full size but fail in actual use. Test the design before committing.
Reduce the image to thumbnail size. Can you still recognize the silhouette and major colors? Convert it mentally—or with an editing tool—to grayscale. Does the design still have enough contrast? Remove the background. Does the character remain visually clear?
Check whether the outfit supports the role, whether the expression matches the personality, and whether accessories make sense. Also look for AI artifacts such as inconsistent hands, duplicate objects, asymmetrical clothing, unreadable symbols, or details that disappear between generations.
Step 8: Create a Character Reference Sheet
A reference sheet is the most important tool for keeping a character consistent. It records the choices that should not change between scenes.
Include:
- Front, side, and three-quarter views
- Full-body proportions
- Close-up facial details
- Three to six expressions
- Main color swatches
- Outfit and accessory notes
- Height comparison when multiple characters exist
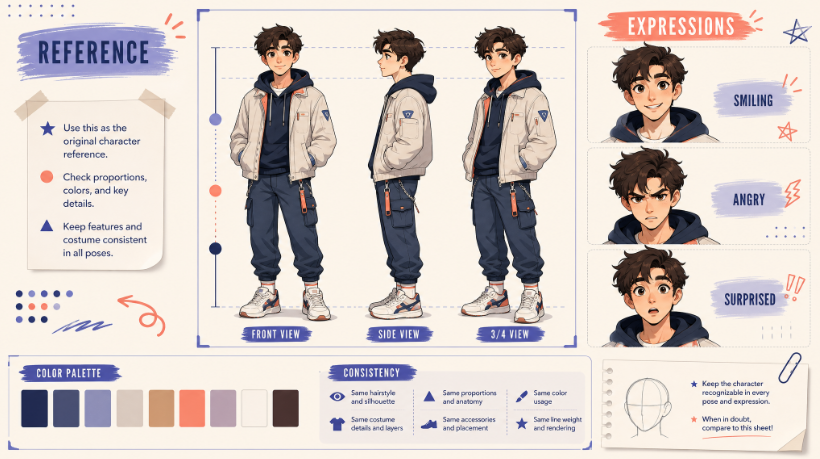
When using an AI character maker, keep the master description unchanged. If your chosen tool supports reference-image input, reuse the same approved reference and change only the pose, expression, camera angle, or scene. This reduces visual drift.
Step 9: Generate New Poses and Expressions
Once the master design is stable, create a controlled set of variations. Begin with a neutral pose, walking pose, action pose, and seated pose. Then generate core emotions: happy, sad, angry, afraid, surprised, and thoughtful.
Describe what should remain fixed. For example: “same face, same short curly hair with copper streak, same navy coveralls and mechanical glove.” Then describe the requested change: “running toward the camera with a determined expression.”
Generate simple backgrounds first. Complex scenes add more variables and make it harder to identify whether character consistency is working.
Step 10: Prepare the Character for Its Final Use
The final assets depend on the project.
For games, you may need turnaround views, action poses, sprite sheets, equipment variations, and transparent backgrounds. For books, you need emotional range and reliable proportions across illustrated scenes. For animation or video, you need storyboard frames and expression references. For branding, you need a simplified mascot version that works in small sizes and one-color printing.
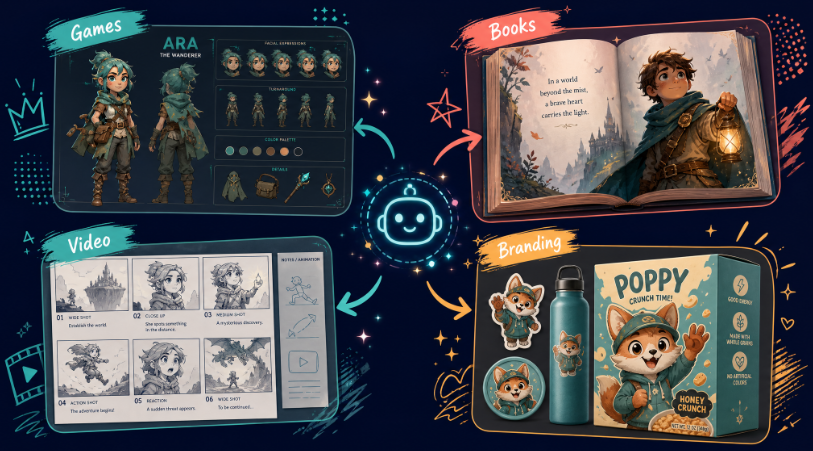
Use PNG when you need a transparent background. Keep high-resolution versions for print and video. If your character is a flat mascot and the tool supports vector export, SVG makes scaling easier. Store the final prompt, reference images, color codes, and approved assets together so future scenes remain consistent.
Example Character Prompts
Here are four templates you can customize.
Fantasy character:
“Full-body fantasy ranger named [Name], lean adult figure, weathered face, dark braided hair, forest-green cloak over leather armor, silver moon pendant, calm observant expression, cinematic fantasy concept art, three-quarter standing pose, misty woodland background, cool morning light.”
Anime character:
“Anime character design of [Name], energetic teenage inventor, round glasses, messy orange hair, oversized utility jacket with colorful patches, holding a tiny drone, curious smile, clean cel shading, dynamic three-quarter pose, bright workshop background.”
Game character:
“Stylized 3D game character named [Name], compact armored space courier, teal helmet visor, white and charcoal flight suit, orange delivery case, alert posture, readable silhouette, game-ready concept art, neutral studio background, front view.”
Brand mascot:
“Friendly flat vector mascot for [Brand], cheerful owl character holding a pencil, rounded geometric shapes, navy blue and warm yellow palette, simple facial features, clean outline, transparent background, suitable for app icon and educational packaging.”
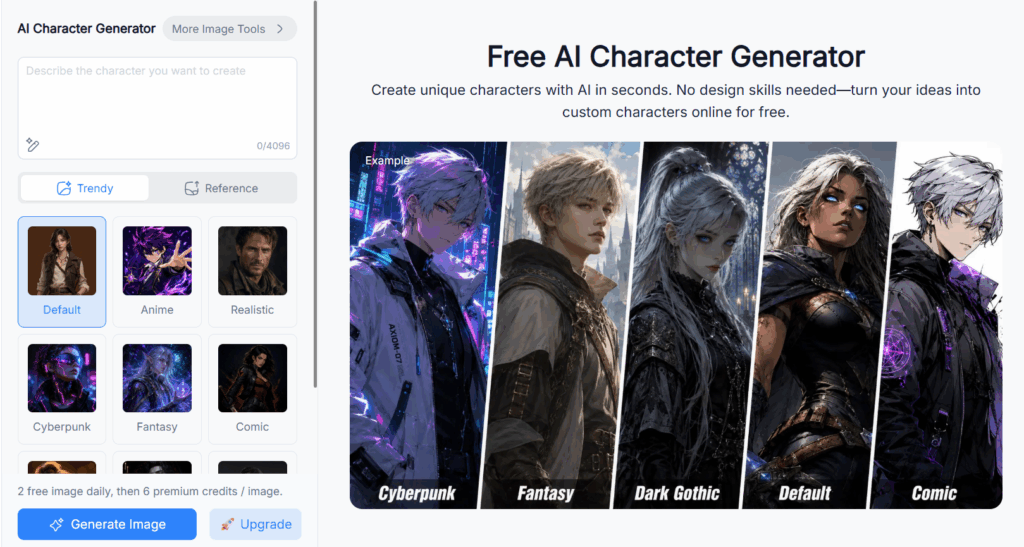
If you want to test these templates quickly, a free character creator lets you compare different styles and refine the visual direction without drawing each concept manually.
Common Character-Creation Mistakes
The first mistake is starting with appearance and ignoring purpose. A stylish character without a clear role often feels interchangeable. Define what the character must do before deciding how it looks.
The second mistake is writing an overloaded prompt. Too many colors, accessories, clothing layers, powers, and settings compete for attention. Choose a few defining traits and let them carry the design.
The third mistake is changing the entire prompt between generations. If every variable changes, you cannot learn which choice improved the result. Keep the core description fixed and adjust one category at a time.
The fourth mistake is skipping the reference sheet. Without one, hair length, eye color, clothing, and proportions will drift between scenes. Consistency requires a stable master description and visual reference.
Finally, do not publish the first output without inspecting it. Check anatomy, accessories, hands, text-like symbols, and commercial usage terms before using the character publicly.
Frequently Asked Questions
What is the easiest way to make a character?
The easiest workflow is to define a role and personality, choose an art style, write a detailed visual prompt, and generate several concepts with an AI character tool. Select the strongest result, refine its defining features, and create a reference sheet before making new scenes.
Do I need drawing skills to create a character with AI?
No. Drawing skills can help with manual refinements, but they are not required for concept generation. You need clear creative direction more than illustration ability. A precise prompt and thoughtful selection process can produce a strong starting design.
What should I include in an AI character prompt?
Include the character's role, age range, body type, face, hair, clothing, signature accessory, personality or expression, art style, pose, lighting, and background. Put the most important identity details near the beginning and avoid contradictory instructions.
How many character concepts should I generate?
Generate at least four to eight broad concepts in the first round. Select two promising directions, combine their strongest details in a refined prompt, and generate another focused set. This gives you variety without creating an unmanageable number of options.
How do I keep an AI character consistent across images?
Create a master prompt and reference sheet, then reuse the same identity description and reference image for every generation. Keep facial features, hair, body proportions, outfit, accessories, and colors fixed. Change only the pose, expression, camera angle, or scene.
Can I use an AI-generated character commercially?
Commercial use depends on the generator's license and the plan you use. Review the tool's current terms before publishing or selling the artwork. You should also avoid prompts that copy protected characters, brand mascots, or a living artist's distinctive style.
What file format should I use for a character image?
Use PNG for transparent backgrounds and digital assets, and high-resolution PNG or TIFF for print work. SVG is useful for simple vector mascots when available. Keep the highest-resolution master file and create smaller copies for websites or social platforms.
Can I edit my character after generating it?
Yes. You can revise the prompt, regenerate selected details, use image-editing software, or work with an illustrator to polish the output. Save the original prompt and reference image so edits preserve the character's identity rather than creating a different person.
Final Thoughts
Learning how to make a character is a process of controlled decisions. Start with role and personality, translate those ideas into visible traits, write a structured prompt, and generate enough concepts to compare. Once the design is stable, create a reference sheet before producing additional poses or scenes.
A custom AI character generator can accelerate exploration, but your creative direction is what makes the result memorable. For more AI-powered creative and productivity tools, explore NoteGPT to support your visual storytelling and content workflows.